Showing posts with label makeup brushes. Show all posts

Sunday, April 22, 2018

[JOLSE] TIAM My Signature Red C Serum 30ml

[JOLSE] TIAM My Signature Red C Serum 30ml
by Violetta


Hey Loveliez!
Today I want to write about the TIAM Signature Red C Serum, which was sponsored by jolse.com.
This product contains "20% pure vitamin C, vitamin B12 and glutathione to deliver results in plumper, firmer, more radiant skin that appears naturally healthy, vibrant and younger looking."


The product is a red / orange liquid and really thick in consistence,but doesn´t feel sticky at all. The container includes a pipette to dose the product. The directions say that you need 2-3 drops for your face. You can use it once or twice a day, before applying lotion and cream. You can mix it with toner, but I discovered that it doesn´t mixes up with some moisturizers.


Since I´m a really straight person, I´ll let you know in the beginning of this blog post that I´m not really happy with this product.
I have used this product for two weeks every day now. The first time, 3 drops were not enough for my skin. So I used 5 drops the day after that, but that was to much. From then on, 3 drops were exactly the right amount for my skin. I feel like my face needen the vitamins and after getting it once, my face didn´t needed as much as for the first time. But I recognized that my face turned red after having it on my skin for about 1-2 minutes. I tryed the product on other areas of my skin, not only my face, and it did also turned a bit red, but not as bad as my face. the skin of my hand for example didn´t turned red. My sister also tryed it out and she said that she didn´t had such problems with it.


Advantages:

  • easy to dose and to apply
  • small container (but leaks just a bit sometimes)
  • includes vitamin C, vitamin B12 and glutathiode
  • you only need a small amount for your whole face

Disadvantages:

  •  intense medical smell! (even after mixing with toner or moisturizer)
  • red face after using it!
  • a bit pricy for small amount (16$ for 30 ml)
I don´t know for sure, if it helped my skin and if it did what it promissed, but I think I saw an improvement. After using it in the evening (because I couldn´t use it in the morning because of my red face), my skin feld a bit younger and healthier. But for me, it wasn´t a good result considering my red face in the evening.


In the end, I personally wouldn´t recommend you this product. Even it I let out the fact, that I get a red face every time after using it, because my sister says she doesn´t, the smell is a really great disadvantage, believe me! It doesn´t leads you to use it at all!!! I personally am not going to use it anymore.
But thank you for reading my review. Maybe you have a different opinion? Let us know in the comments. I´m really curious about what you think about is, since I don´t like it at all.

We would be really happy if you'll follow us on facebook and twitter !

Friday, April 6, 2018

DIY Avocado Face Mask (with natural ingredients)

DIY Avocado Face Mask (with natural ingredients)

by Rosalie


Hi Lovelies,
long time no see.  I am sorry that I havent showen up so much lately but I was really busy. Maybe also the long wintertime made me be a bit lazy, too haha... who knows! ;)

But now spring is starting and I am really excited about planting and having my own growen vegetables and stuff soon. With this enthusiasm and my leftover avocado I decided to do a diy avocado face mask, also as recipe just for you! <3

I love eating avocado for breakfast but sometimes there are leftovers that couldn't be eaten. So I decided I will use it as mask instead of only throwing it away. (I guess I am not the only person with this problem, let me know if you have this problem from time to time, too.)


So for the recipe, you need ingredients that you mostly have at home anyway.
You need:

-avocado leftover
-honey
-milk
-fork or spoon
-small bowl


So at first I putted the avocado into a small bowl and tried to mash it up so that there is kind of a creamy consistency. Next I added one tablespoon of honey and also one tablespoon of milk. The honey helps to let the mask stay on your face but also addes more moisture. The milk makes the mask more creamy. You need to be carefull with the amount. If you havent so much avocado then use less milk, because the mask can become to much liquid. Give everything a good mix and the mask is done.


this is how the finnished mask looks like


Before you apply the mask you need to clean your face (as usual before you put on a mask) and your hands. After I applyed the mixture with my fingers onto my skin and massaged it into it. I have to say that the amount of mask was nearly to much for my face, so you see you don't need much avocado. After the mask is evenly applyed onto my face I left it on for 20 minutes. Just at the beginning I could feel the cooling effect of the mask. This is really great for hot springdays or summer. 

Me with the mask onto my face, after 20 min on. I kind of look like an alien to strangers. lol


Also the mask didn't dropped of from my face. After the 20 minutes the mask was kind of soaked into my skin. I massaged the leftover mask into my face and washed it of with lukewarm water. If you love the smell of avocado this is also amazing for you. All the time I made the mask and had it onto my face it smelled amazingly like fresh avocado. yummi! <3

I had no skintroubles after the mask and my skin feeled really clean and nice but not dry.
So I think this is a nice opportunity for not throwing away the leftover.


I hope you like this kind of recipe, if you want more mask recipes like this please let me know.


To stay updated about our blog please follow us on facebook and twitter ! <3333 That would make us really happy!
 

Wednesday, December 27, 2017

[JOLSE] "Hope Girl Honey Bee Venom Multi Solution Cream"

[JOLSE] "Hope Girl Honey Bee Venom Multi Solution Cream"

by Rosalie 


Hi Lovelies,
I dont know about you, but I love to try out new skincare products. I love nice smelling and moisturizing ones with a nice product design. Just like the cream I am writing about today. 
The cream is from the korean brand "Hope Girl" named "Bee venom multi solution cream". I havent tried any product from this brand so I was kind of sceptical at first. Also I have oily skin so using products with honey extract in it can be troublesome.

anyway, let me give you some infomations abut the product at first:


BRAND: HOPE GIRL

VOLUME: 55ml

PRICE: $18

TYPE OF PRODUCT: CREAM


I got  the product from jolse.com .

The design of the packaging is really cute, it looks like I am taking the bottle out of a beehive and is full of honey. Haha I love it.


Opening the bottle is amazing, because the smell of the product is so awesome. It smells like honey but also has a lemony touch in it. The cream itself is light yellow, just like the colour of light honey. 


Sadly the product don't came with a spoon. Ok, I mostly loose the spoons but I know for many of you it's an important hygienic thing to use a spoon while you put out the cream from the bottle.


After applying the cream it takes a bit longer to soak into my skin compared to other creams. But it's all gone after a minute or two. So it's also ok. Also it really does a great job on my oily skin. Right now we have winter here in Germany, so my skin needs much moisture, and this honey cream does a nice job. But I guess in summer the cream would be a bit to heavy for my skin. But I have used it daily and have no break outs or anything. So as the description sais, you can use it on all skin types.


But I have to say that the crem is more on the expencive side. I mean the cream is worth it but if you havn't enough money I can understand you when you struggle if you buy it or not.


advantages:
-rich on moisture
-nice smell
-also nice on oily skin
-cute packaging 


disadvantages:
-no spoon
-more on the expencive side


 All in all I can say I really like the cream, the texture and the smell. It is just perfect for my daily use and also is nice to use before my make up. So I can highly recommend you this cream, also to oily skin types.

I hope this review was helpfull for you. If you have some questions please feel free to ask! :)


To stay updated about our blog please follow us on facebook and twitter ! <3333 That would make us really happy!


Thursday, December 7, 2017

Etude House "Drawing Eye Brow" #2

Etude House "Drawing Eye Brow" #2

by Rosalie


Hi Lovelies, 
ahen I scroll down my instagram page I see all these amazingly perfect pictures of makeup and beautifull korean models. I am kind of jeallous, I WANNA LOOK LIKE THIS, TOO!!! :D

But I can do what I want my face isn't the most perfect. The worst part of my face is one of my eyebrows, where I have a scar right in the middle. I dont want to overlayer this part but a nice eyebrowpencil would be nice, wich can overline this scar and I am constantly searching for one. To write about this is kind of hard for me, but maybe you also have problem zones in your face and I want you to not feel alone! ;)


I choosed the colour #02


But this is only a sidestory, in general I wanted to write about a eyebrowpencil in this blpogpost. About my first eyebrowpencil from my favourite korean brand, Etude House. *__*

BRAND: ETUDE HOUSE

PRICE: $3,60


TYPE OF PRODUCT: EYEBROW PENCIL 

You can get this product in 7 different colours wich is kind of amazing! There are really dark colours, but also yellowish colours for people wich want to have blond eyebrows. I have chosen a ash brown like colour. I don't like to have super dark eyebrows but filling in my brows a bit makes me look much more fresh. So this colour was kind of a good oportunity for me.

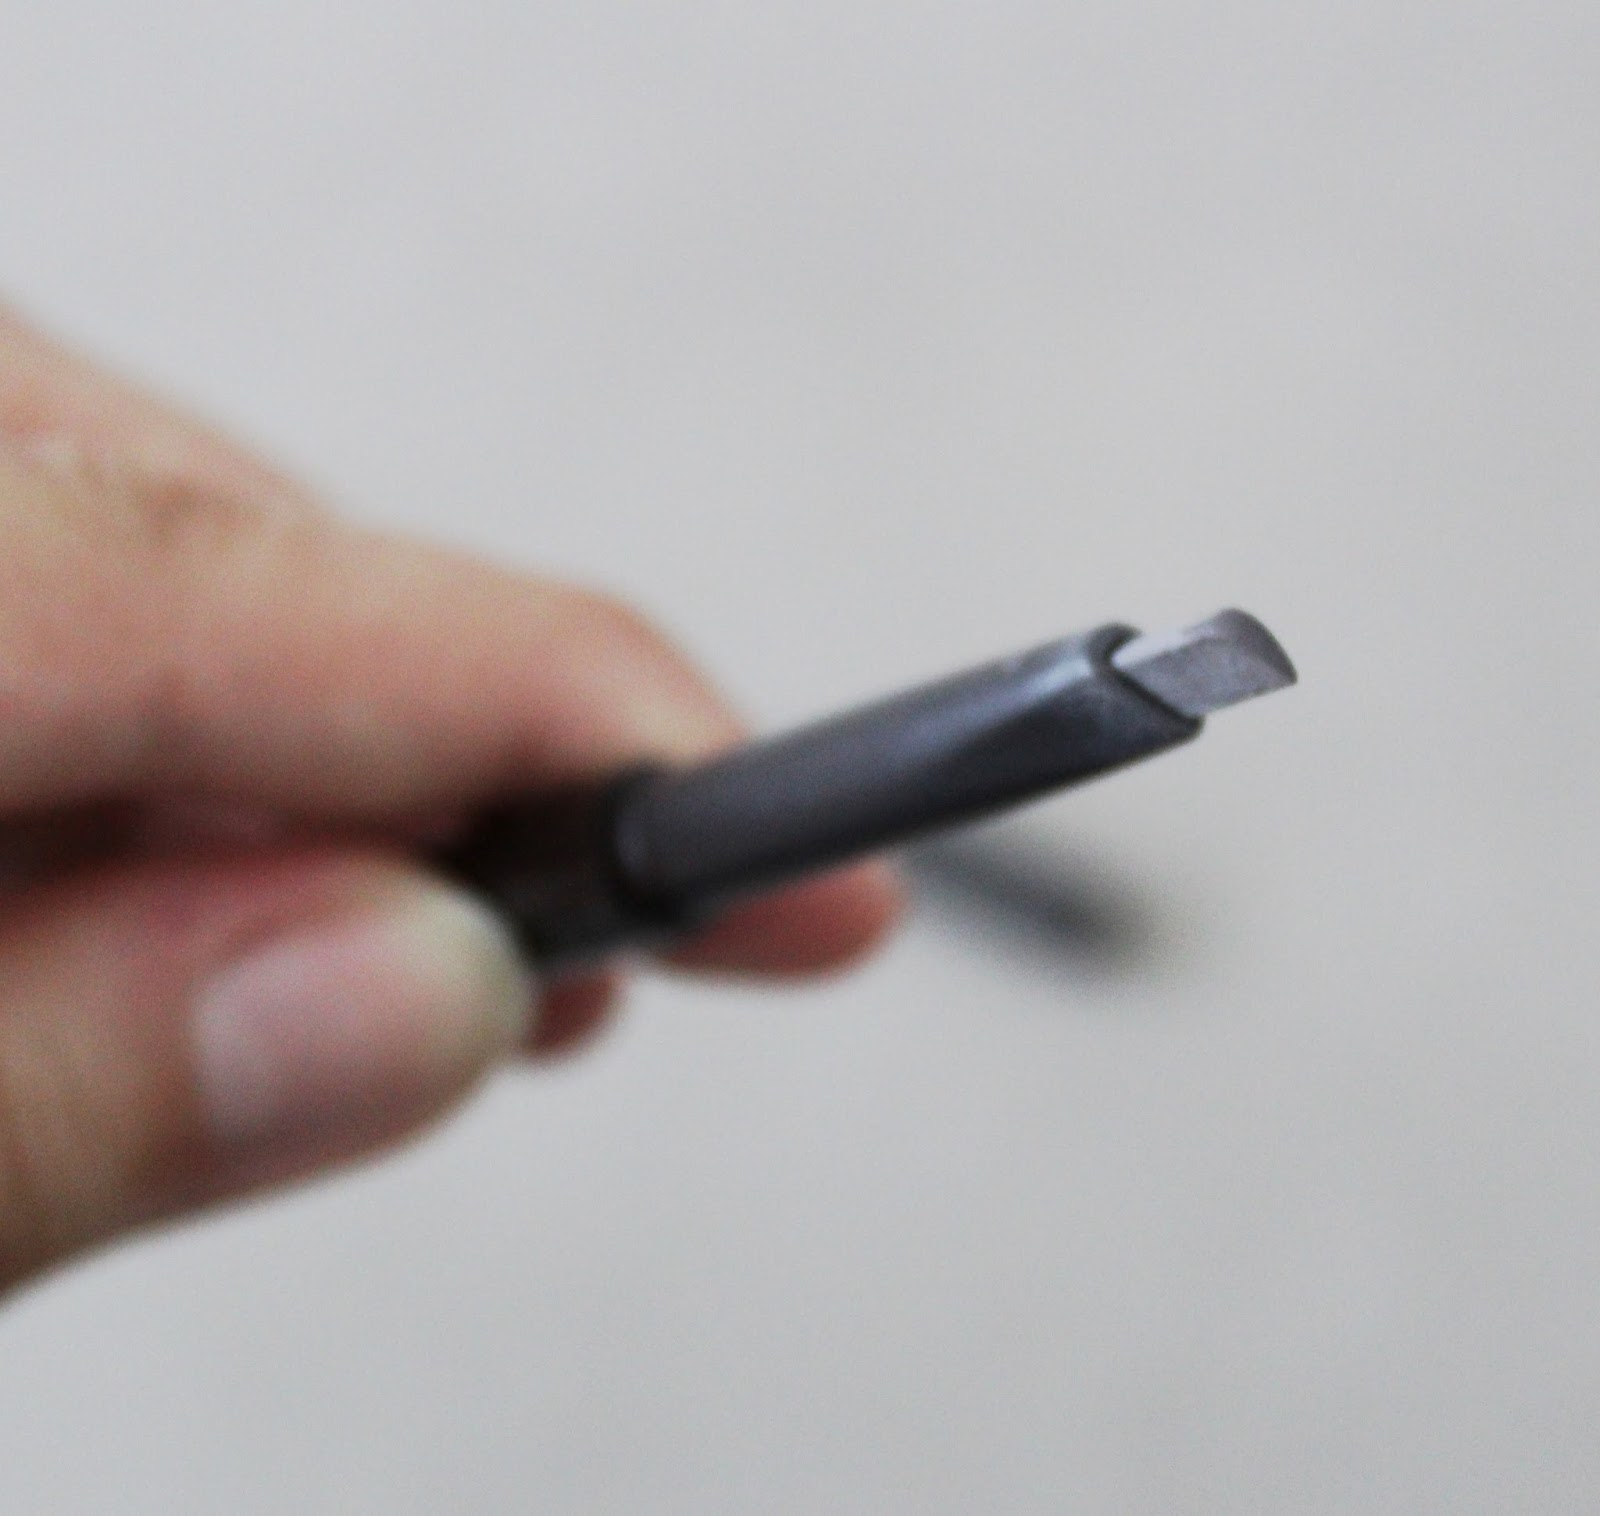
triangular shape of the pencil

because of the shape the pencil can draw thin and thick lines


two different sides, the pencil and the brush


The product came with the pencil itself and a brush, to soften the lines in the eyebrow. I always like product types wich has the full equipment on itself to apply it and use it in the best way. So in this situation I mean you can apply the product itself and also brush it off.

The pencil itself is really thin, wich makes is easy for me to apply it. In a stressfull morning there is nothing more nerve wrecking for me to sharpen all my pencil. But I can only twirl and there is more thin pencil product, yeii! <3

The product is nicely pigmented but not to soft in drawing. (I think a eyebrowpencil must be a bit harder than a normal eyeliner.) So if you only want to colour your brows a bit it is really easy. 

But I also have to say that this product is not waterproof. On my brows the product stayes the whole day, but I only wanted to take your attention to this point! ;) But because of this it is easy to remove with normal make up remover.

 In the following you can see the pencil lines on my hand and on my brows:

thin and thick lines

blended lines

left: without any product, right: with the eyebrowpencil and blended
 

All in all I really like this product. As you may can see in the swatches the pencil doesn't draw on my scar skin, but thats just as every eyebrowpencil workes on this park. It took on the color a bit but not like the other skin take the colour on. :( (But I guess there aren't so many people who have the same problem as I have though, so this might not be a big deal for you!) <3


Do you also have problems with scar skin and the coverage of makeup on it? Please let me know, also if you have some hacks how to work in this skin, feel free to share! ;) (But it is also ok if you just wanna share your problem zones with me and we can be unhappy about them together! haha)

I hope this review was helpfull for you. If you have some questions please feel free to ask! ;)


To stay updated about our blog please follow us on facebook and twitter ! <3333 That would make us really happy!


Thursday, June 8, 2017

Etude House "Pink Showroom Customizing Palette"

Etude House "Pink Showroom Customizing Palette"

by Rosalie


Hi Lovelies,
I love to collect things. Not all things, but all the things I like, why not collecting them?
Yep, that really can be a problem! :D
I also collect eyeshadows, these small containers. As I tried to reorganize my make up desk I realized that I started to build high towers with all these small eyeshadow containers. I searched for something to put all of them in, a palette or something, but all palettes that Etude House had were to small or to big for the number of eyeshadows I had.
And out of nowhere Etude House came out with a new palette, where you can put in your play 101 eyeshadows AND the dear my enamel eyes talk things plus a blusher. Amazing! ok, I don't have a blusher for this size but well, I thought it will be so nice to have all of these things organized in one, to be able to use them together and don't always bring ton's of these small containers.

So I decided to buy this "Pink Show Room Customizing Palette". *__*


BRAND: ETUDE HOUSE

PRIZE: $ 14.40


The palette came with a mixing palette, a double side brush and small magnets (that I couldn't find anymore haha, sry! But I don't needed them anyway!)

Here you can see the already filled palette.
The colourfull layer is in holographic optic, I guess because it's the trend these days. I would have prefered an other option, like a uni colored one, but anyways, this makes the palette really interesting.

I haven't used the brush so far because I am afraid to make it dirty (like I am with all brushes and make up things in the beginning! :D ) and I really don't know how I would ever use the mixing palette, but maybe time comes by and I need it! We will see...

In generall, all my eyeshadows are together in this palette, I am so happy! <3


This is the mixing palette...


...and this is the brush.


Now I will show you how you can put out the eyeshadow of the original small container, to put it into the palette.


 I have one enamel eyes talk left, so let me show you with this how it will work...


You need your container of course and a thin needle or a pin. After putting it out, the left overs will look like this.


 Can you see the hole? You have to stick in the needle to push out the eyeshadow.


Just push and it will come out easily.


This eyeshadow is supposed to sit in one of the upper howles. So you can combine your palette new how often you want. Seriously, I think it really was fun to see how well the colors match together.

It really makes it more easy to use the eyeshadows at once. I am so happy that I have bought this palette.

So if you are like me and have loooot's of these small container's I simply recommend you to buy a palette, too, because they are really handy.

Please let me know if you ahve problems with all these small container's, too.

I hope this review was fun and helpfull for you! ;)

I also would be really happy if you follow us on facebook and twitter to never leaf a new review out! <33